. 2016 Jun 22;6(2):e24.
doi: 10.2106/JBJS.ST.16.00018.

Autologous Chondrocyte Implantation

Affiliations

Autologous Chondrocyte Implantation

Tom Minas et al. JBJS Essent Surg Tech. .

Abstract

Introduction: Autologous chondrocyte implantation (ACI) for the treatment of articular cartilage lesions of the knee joint provides successful and durable long-term outcomes.

Step 1 preoperative planning video 1: Obtain standing radiographs and magnetic resonance imaging (MRI) scans to identify all associated abnormalities (background factors).

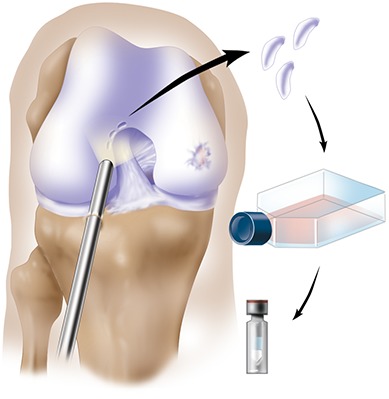
Step 2 arthroscopic assessment and cartilage biopsy video 2: Evaluate the knee joint systematically and harvest cartilage tissue from the non-weight-bearing area.

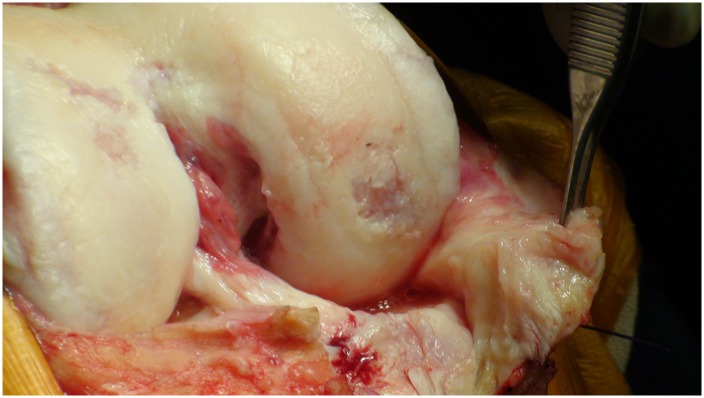
Step 3 make the incision for the arthrotomy video 3: Use a medial or lateral parapatellar arthrotomy and expose the lesion adequately.

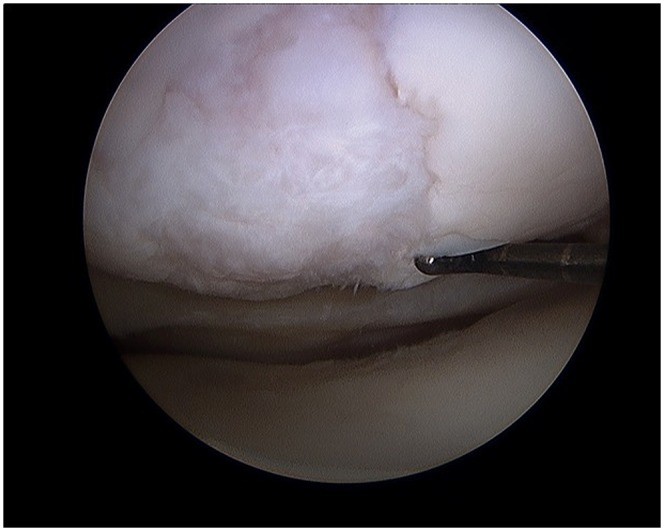
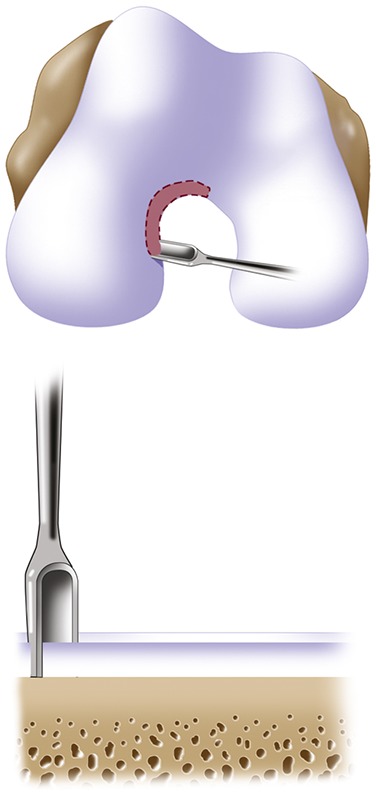
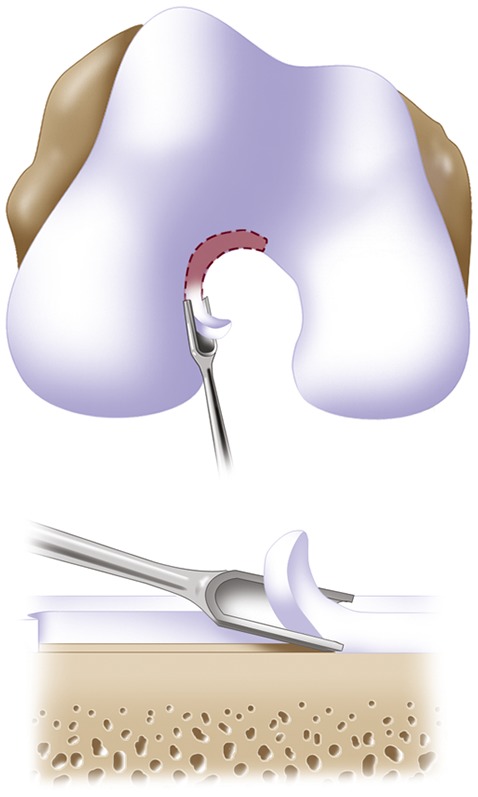
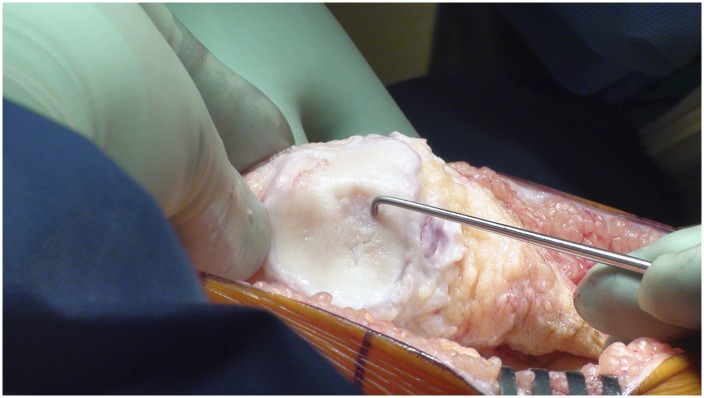
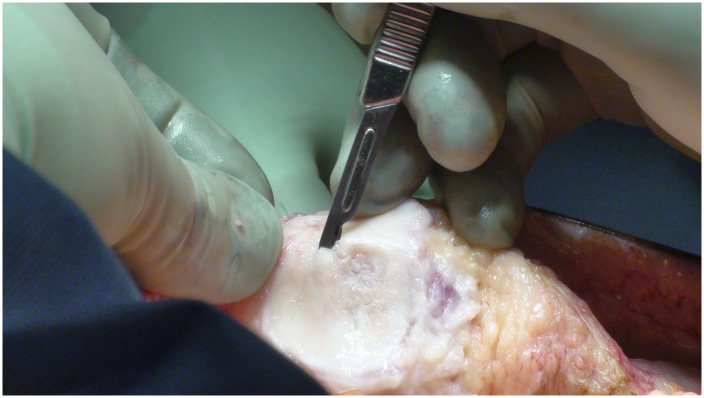
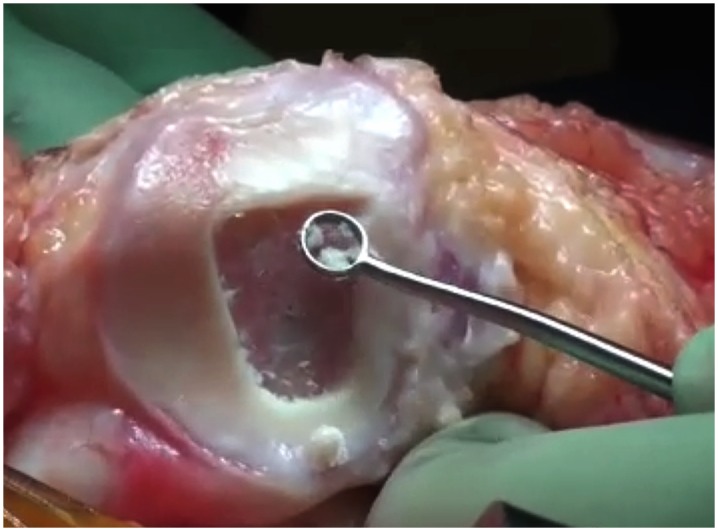
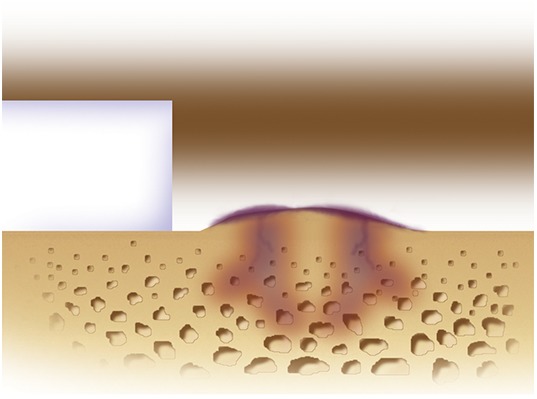
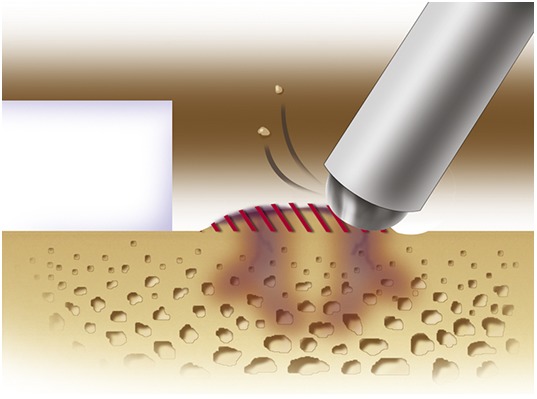
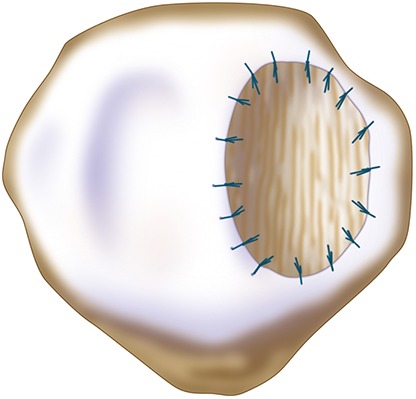
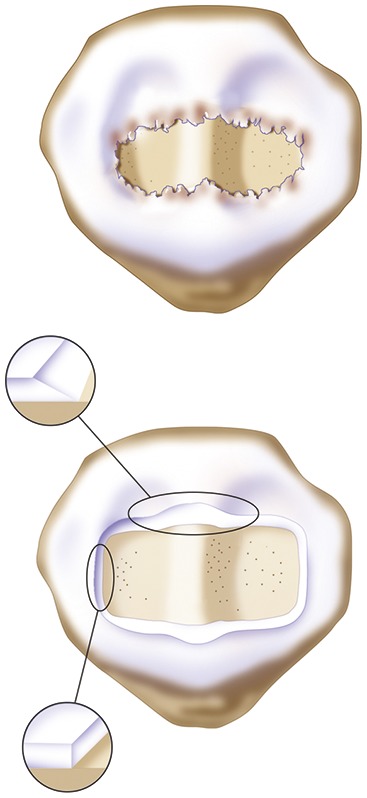
Step 4 prepare the defect video 4: Debride all fissured and unstable articular cartilage surrounding the full-thickness chondral injury down to healthy contained cartilage.

Step 5 address associated abnormalities: Address associated abnormalities (predisposing background factors) to optimize recovery and a successful outcome.

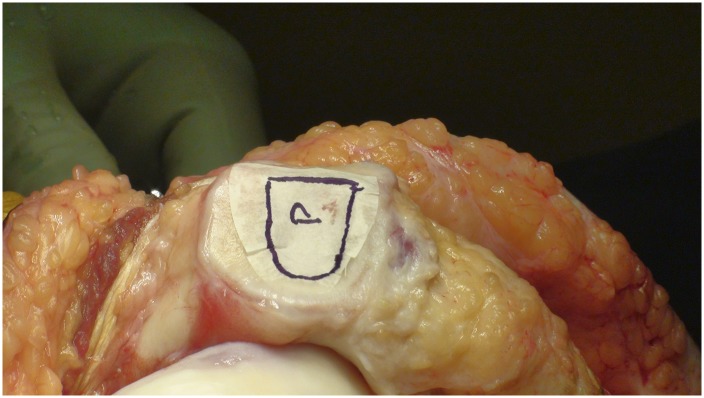
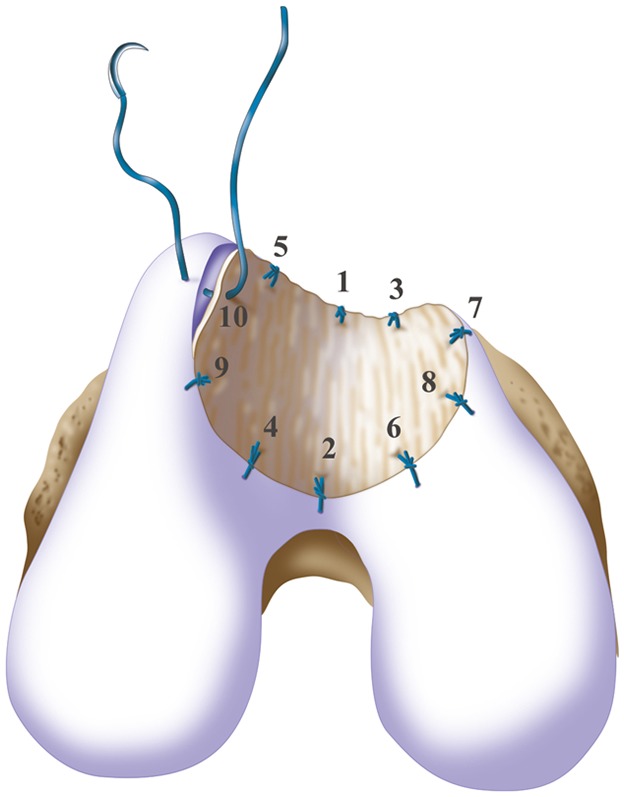
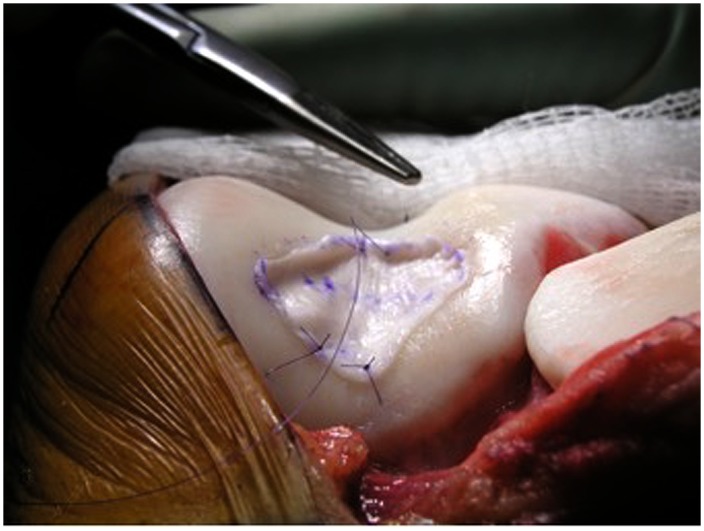
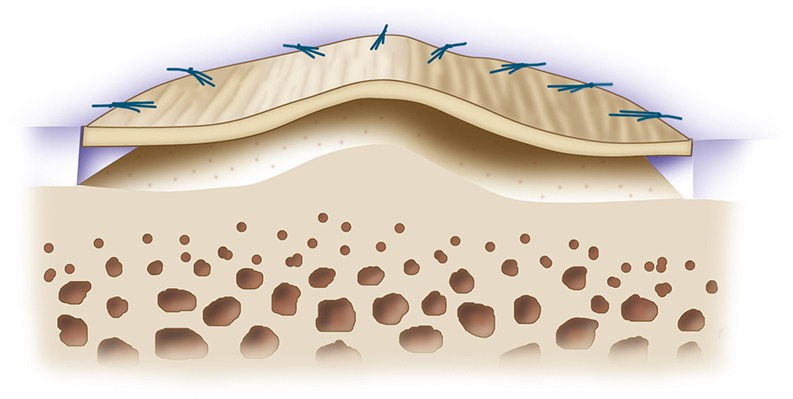
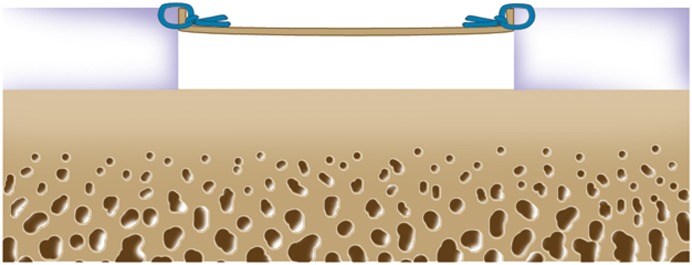
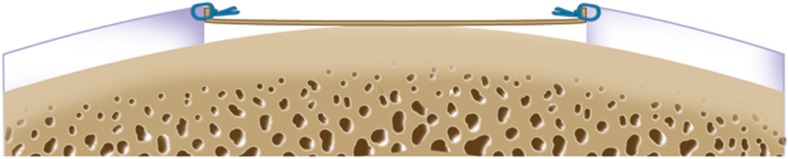
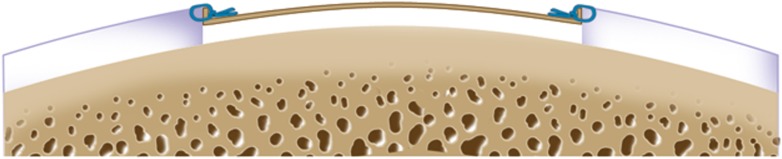
Step 6 prepare and fix the collagen membranes video 5: Orient the membrane patch with the rough surface to the subchondral bone and the smooth surface toward the articular surface; then sew it, tying the sutures knots on the membrane and not the cartilage, to tension it adequately throughout the entire defect.

Step 7 chondrocyte implantation video 6: Gently deliver the cells and fill the defect.

Step 8 postoperative care: (1) Initiate range-of-motion exercises to enhance chondrocyte regeneration and decrease the likelihood of intra-articular adhesion, (2) protect the graft from loading for 6 to 12 weeks after surgery to prevent graft overload and central degeneration or delamination of the graft, and (3) initiate isometric muscle exercises to regain muscle tone and prevent atrophy.

Results: ACI provided durable outcomes in 210 patients followed prospectively for 10 to 17 years after treatment with the first-generation ACI-periosteum technique6.


Figures

Fig. 1
Fig. 1
Arthroscopic evaluation of this knee joint identified a focal area of cartilage damage on the lateral femoral condyle. (Reproduced, with permission of Elsevier, from: Minas T. A primer in cartilage repair and joint preservation of the knee. Expert consult. Philadelphia: Elsevier Saunders; 2011.)
Fig. 2-A
Fig. 2-A
A sharp small gouge is used to score the articular cartilage from the superior part of the intercondylar notch to the sulcus terminalis on the lateral wall.
Fig. 2-B
Fig. 2-B
All layers of cartilage down to bone are harvested to obtain representative articular cartilage layers using a side-to-side whittling motion.
Fig. 3
Fig. 3
Arthroscopic evaluation of the knee joint and identification of full-thickness damage on the medial femoral condyle. A cartilage specimen is biopsied from the superior part of the intercondylar notch, digested, and cultured. ACI is performed after the cells have reached a volume that can fill the articular cartilage defect. (Reproduced, with permission of Elsevier, from: Minas T. A primer in cartilage repair and joint preservation of the knee. Expert consult. Philadelphia: Elsevier Saunders; 2011.)
Fig. 4
Fig. 4
Exposure of the posterior, weight-bearing portion of the condyles and tibial plateau. Medial parapatellar arthrotomy is performed with patellar eversion, and the surgeon incises the intermeniscal ligament followed by the coronary ligament attachment to the tibial plateau with a medial subperiosteal peel off the tibia in a posterior direction.
Fig. 5-A
Fig. 5-A
Close-up view of a patellar defect.
Fig. 5-B
Fig. 5-B
Incision of articular cartilage vertically down to the subchondral bone plate.
Fig. 6
Fig. 6
Debridement of the degenerated articular cartilage back to healthy host cartilage using small ring or closed curets (6 or 8-mm diameter) and periosteal elevators.
Fig. 7-A
Fig. 7-A
Intralesional osteophytes may form after use of a marrow stimulation procedure (abrasion, drilling, or microfracture) as well as from idiopathic osteoarthritis.
Fig. 7-B
Fig. 7-B
A 5-mm high-speed burr is used gently, under irrigation, to remove sclerotic cortical-type bone to the level of the adjacent native subchondral bone.
Fig. 8
Fig. 8
A template of the defect made using sterile tracing paper and a sterile marker.
Fig. 9-A
Fig. 9-A
Microsuturing should start at the central portion of the sulcus proximally and distally in an alternating medial and lateral pattern to restore the concavity to the trochlea, as shown by the numbers indicating the sequence of the sutures. (Reproduced, with permission of Elsevier, from: Minas T. A primer in cartilage repair and joint preservation of the knee. Expert consult. Philadelphia: Elsevier Saunders; 2011.)
Fig. 9-B
Fig. 9-B
When microsuturing the membrane over a large trochlear defect across the midline sulcus, it is important to oversize the membrane in a medial-to-lateral direction. Suturing in a proximal-to-distal direction starting at the midline of the sulcus and working laterally and medially allows restoration of the concavity of the sulcus without undue tension on the membrane and an even depth throughout the entirety of the cartilage defect. (Reproduced, with permission of Elsevier, from: Minas T. A primer in cartilage repair and joint preservation of the knee. Expert consult. Philadelphia: Elsevier Saunders; 2011.)
Fig. 10-A
Fig. 10-A
An isolated medial or lateral patellar facet is a flat surface and it is easy to microsuture the membrane flush with the articular surface.
Fig. 10-B
Fig. 10-B
When the defect is large, like this Fulkerson12 type-IV patellar chondral defect (pan-patellar), a good result depends on good debridement technique as well as microsuturing. If the cartilage is thick, the bleeding and trailing edge should be slightly beveled to allow easy tracking in the proximal-to-distal direction and vertically on the medial and lateral margins to allow maximal membrane stability.
Fig. 10-C
Fig. 10-C
As in the trochlea, microsuturing should start at the apex or median ridge of the patella in order to “pitch the tent.” It then should alternate medially and laterally in a proximal-to-distal fashion to restore the articular topography of the patella. This technique will maintain a uniform cavity deep to the membrane so that articular cartilage grows evenly to the limiting membrane.
Fig. 11-A
Fig. 11-A
The suture is placed through the membrane and then the cartilage to obtain good purchase of both tissues. The knot is tied on the side of the membrane to evert the membrane flush to the cartilage side wall and make it watertight, acting like a washer.
Fig. 11-B
Fig. 11-B
For femoral condylar defects that are long in an anterior-to-posterior direction, it is important for the suturing technique to maintain a uniform cavity throughout the length of the defect. If medial-to-lateral suturing is not performed through the length of the defect from anterior to posterior, the membrane may bottom out on the center aspect of the length of the curve. This site is more likely to undergo premature breakdown.
Fig. 11-C
Fig. 11-C
If the collagen membrane is oversized in the anterior-to-posterior direction, suturing is started at the center of the defect in a medial-to-lateral direction, and then anterior to posterior. The chamber cavity will maintain a uniform depth and will more likely undergo full, even cartilage filling for the length of the defect.
Fig. 12
Fig. 12
The autologous chondrocyte suspension is injected underneath the opening, which is closed after the defect is filled. (Reproduced, with permission of Elsevier, from: Minas T. A primer in cartilage repair and joint preservation of the knee. Expert consult. Philadelphia: Elsevier Saunders; 2011.)

References

    1. Brittberg M, Lindahl A, Nilsson A, Ohlsson C, Isaksson O, Peterson L. Treatment of deep cartilage defects in the knee with autologous chondrocyte transplantation. N Engl J Med. 1994. October 6;331(14):889-95. - PubMed
    1. Pavesio A, Abatangelo G, Borrione A, Brocchetta D, Hollander AP, Kon E, Torasso F, Zanasi S, Marcacci M. Hyaluronan-based scaffolds (Hyalograft C) in the treatment of knee cartilage defects: preliminary clinical findings. Novartis Found Symp. 2003;249:203-17; discussion 229-33, 234-8, 239-41. - PubMed
    1. Bartlett W, Skinner JA, Gooding CR, Carrington RW, Flanagan AM, Briggs TW, Bentley G. Autologous chondrocyte implantation versus matrix-induced autologous chondrocyte implantation for osteochondral defects of the knee: a prospective, randomised study. J Bone Joint Surg Br. 2005. May;87(5):640-5. - PubMed
    1. Behrens P, Bitter T, Kurz B, Russlies M. Matrix-associated autologous chondrocyte transplantation/implantation (MACT/MACI)—5-year follow-up. Knee. 2006. June;13(3):194-202. Epub 2006 Apr 24. - PubMed
    1. Schneider U, Rackwitz L, Andereya S, Siebenlist S, Fensky F, Reichert J, Löer I, Barthel T, Rudert M, Nöth U. A prospective multicenter study on the outcome of type I collagen hydrogel-based autologous chondrocyte implantation (CaReS) for the repair of articular cartilage defects in the knee. Am J Sports Med. 2011. December;39(12):2558-65. Epub 2011 Oct 7. - PubMed

LinkOut - more resources