. 2021:2329:249-263.
doi: 10.1007/978-1-0716-1538-6_18.

Analyzing Centrioles and Cilia by Expansion Microscopy

Affiliations

Analyzing Centrioles and Cilia by Expansion Microscopy

Dong Kong et al. Methods Mol Biol. 2021.

Abstract

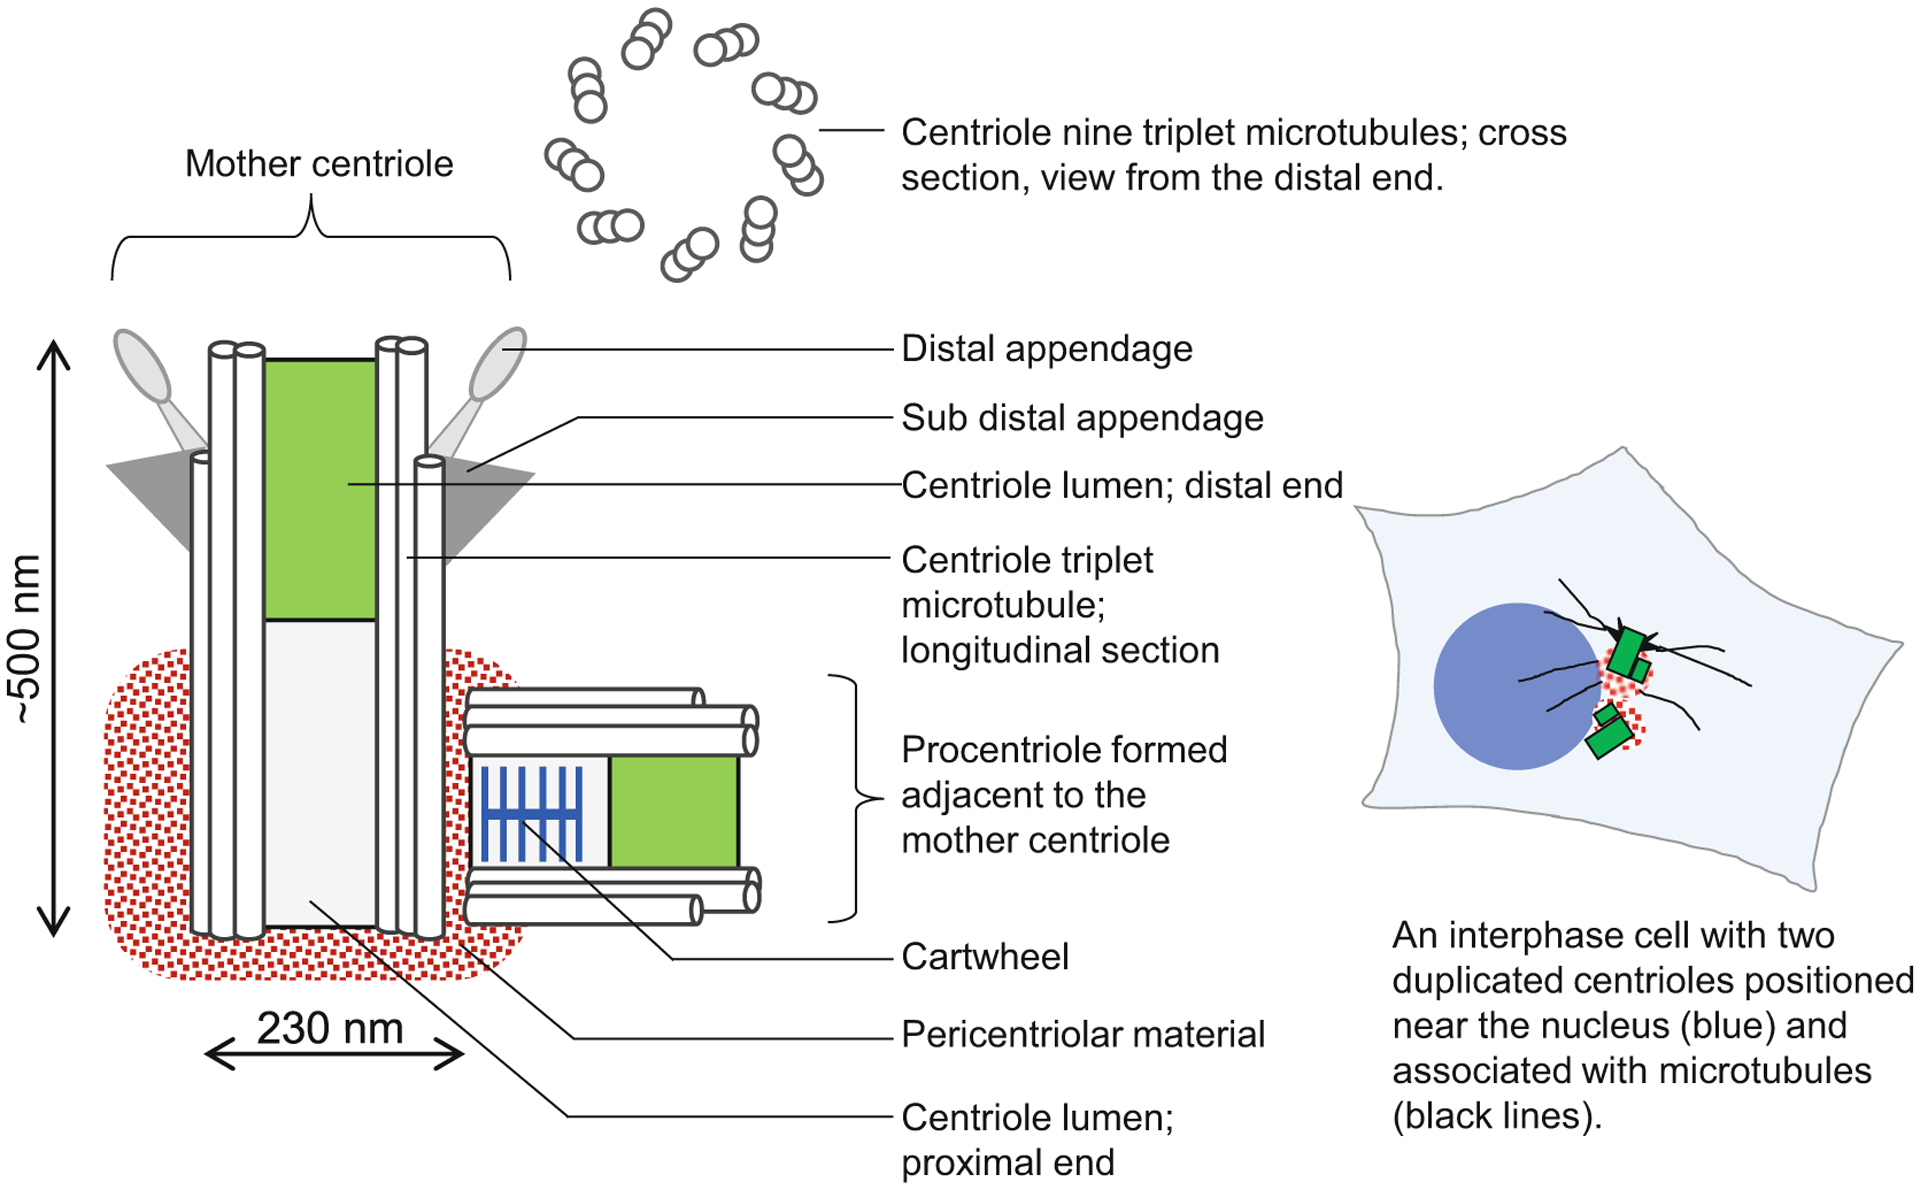
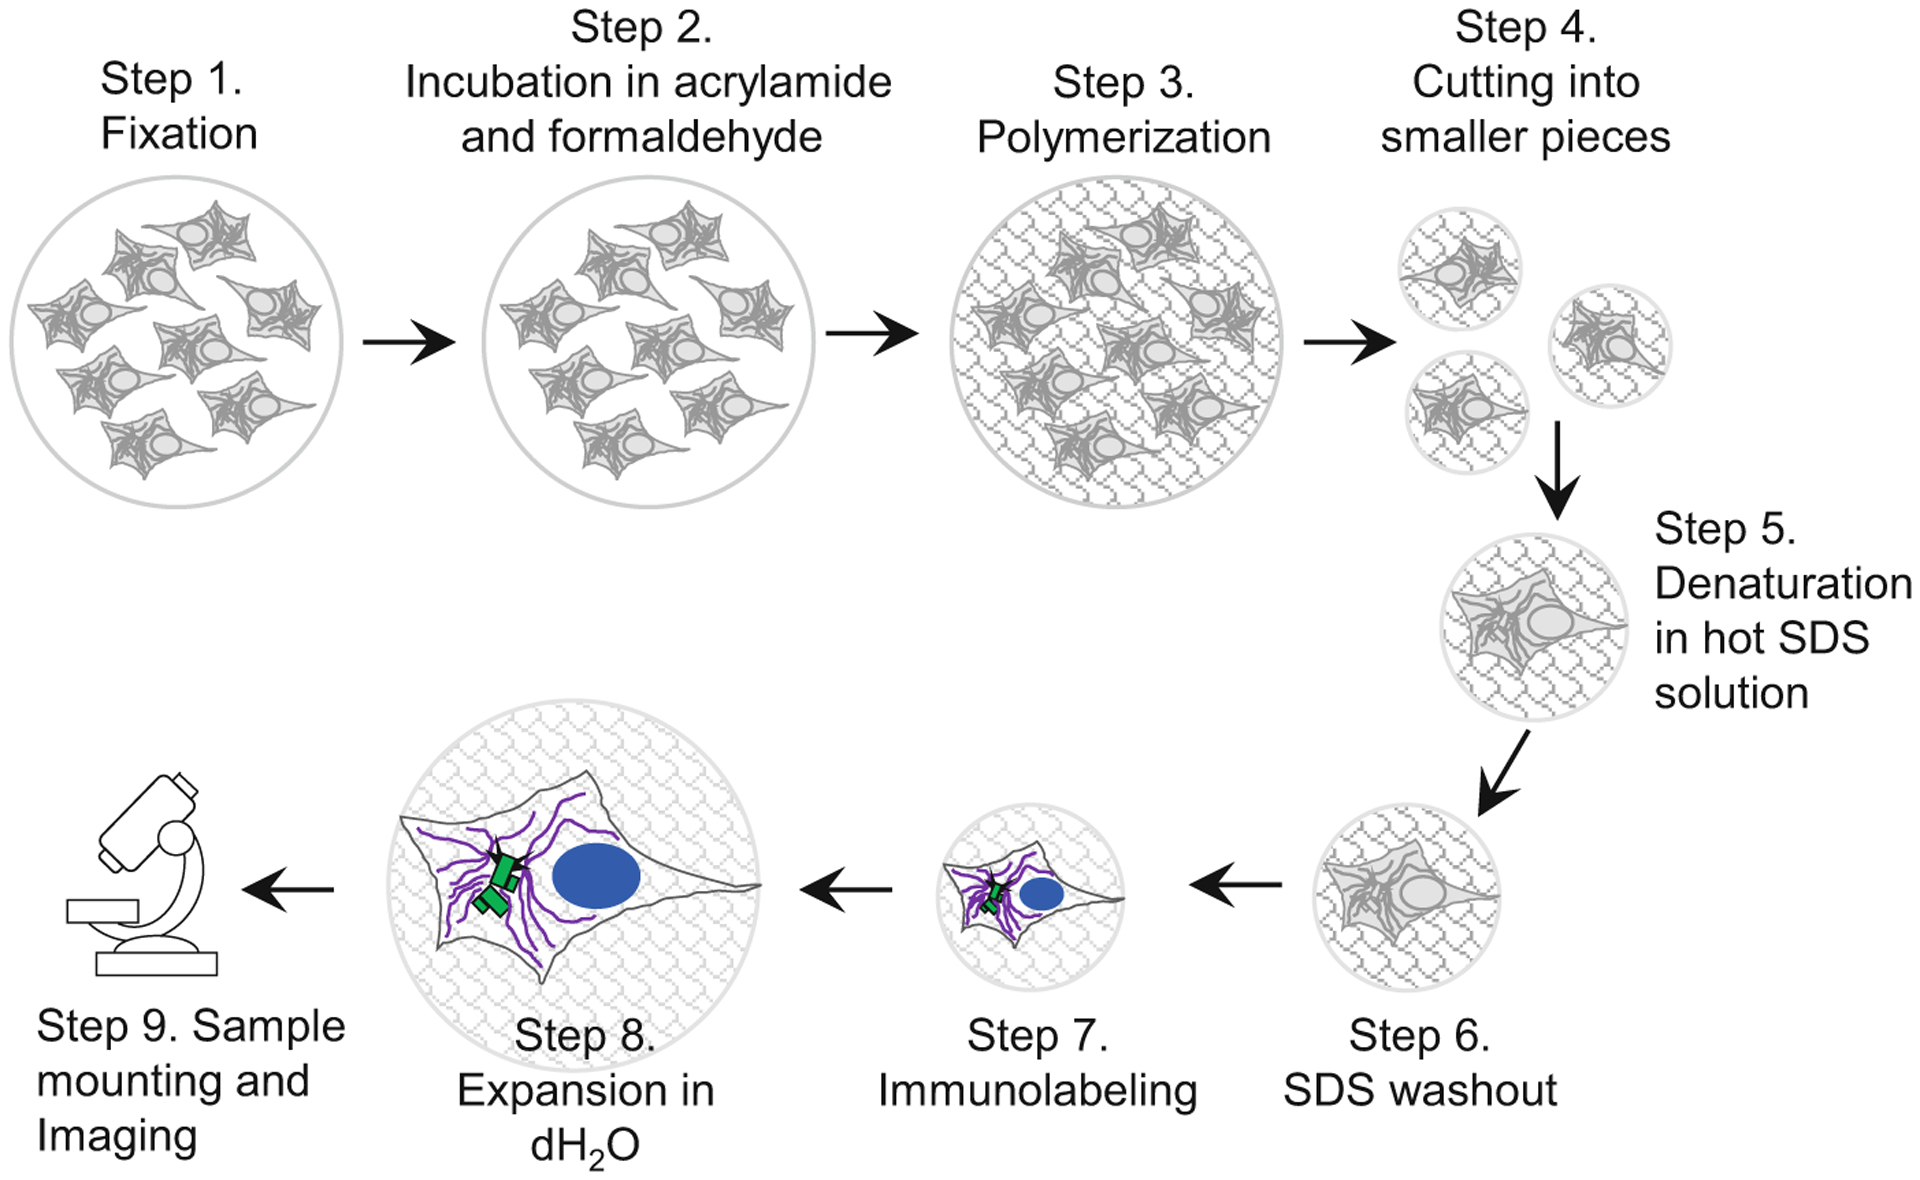
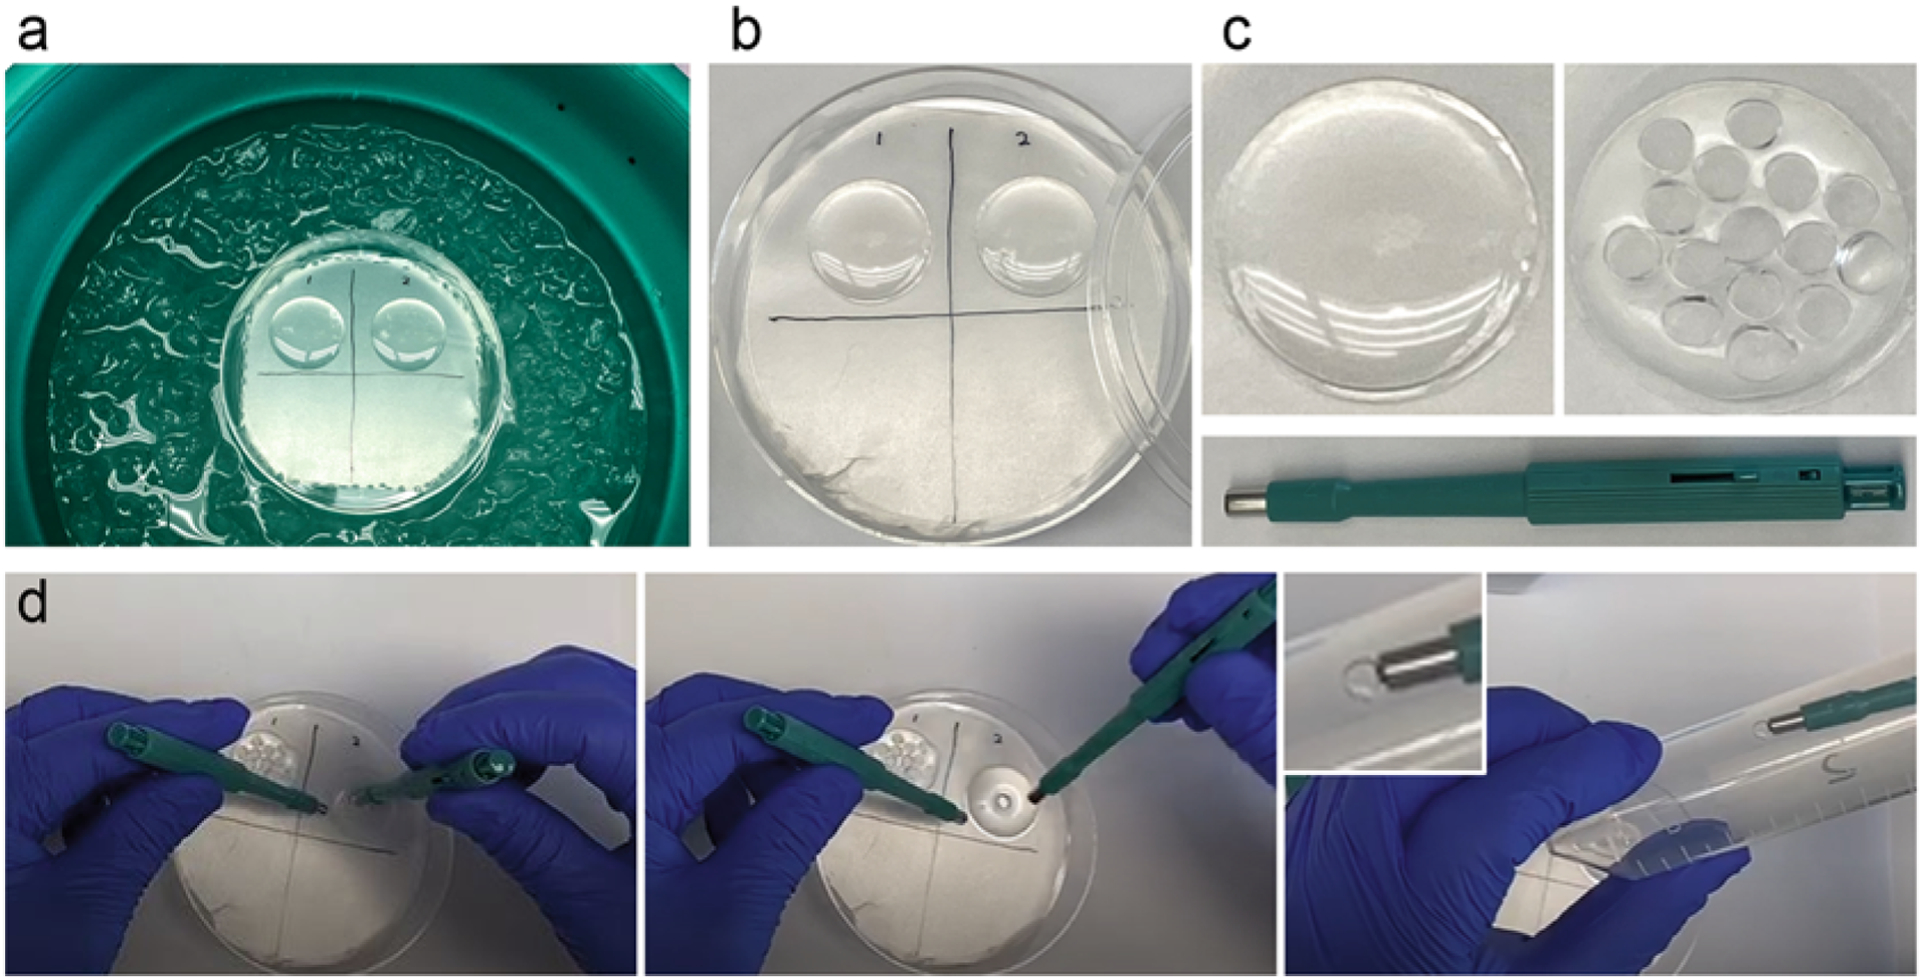
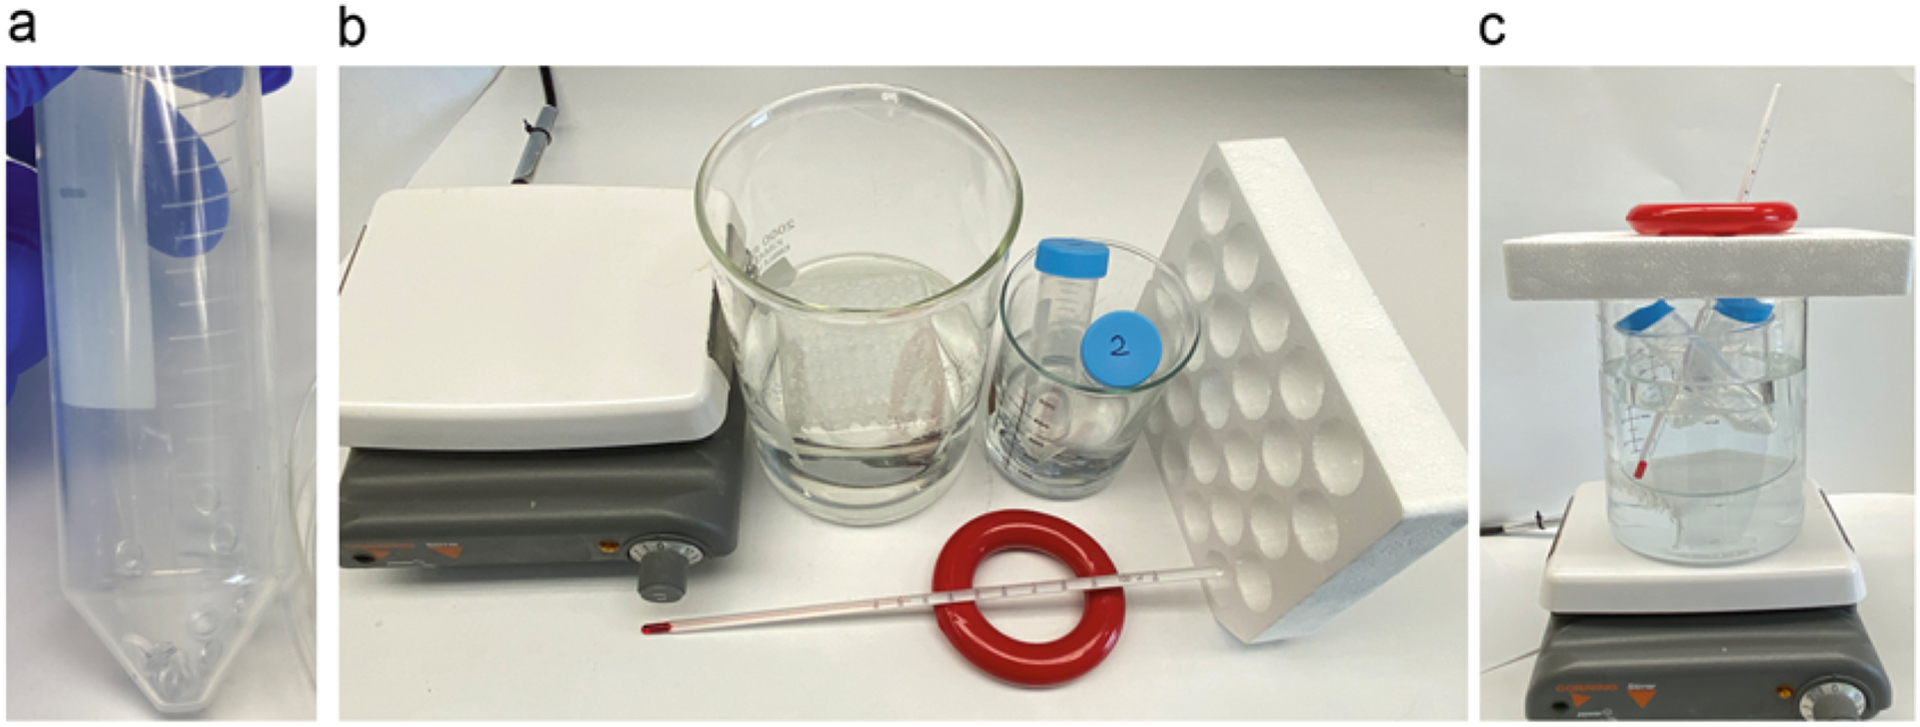
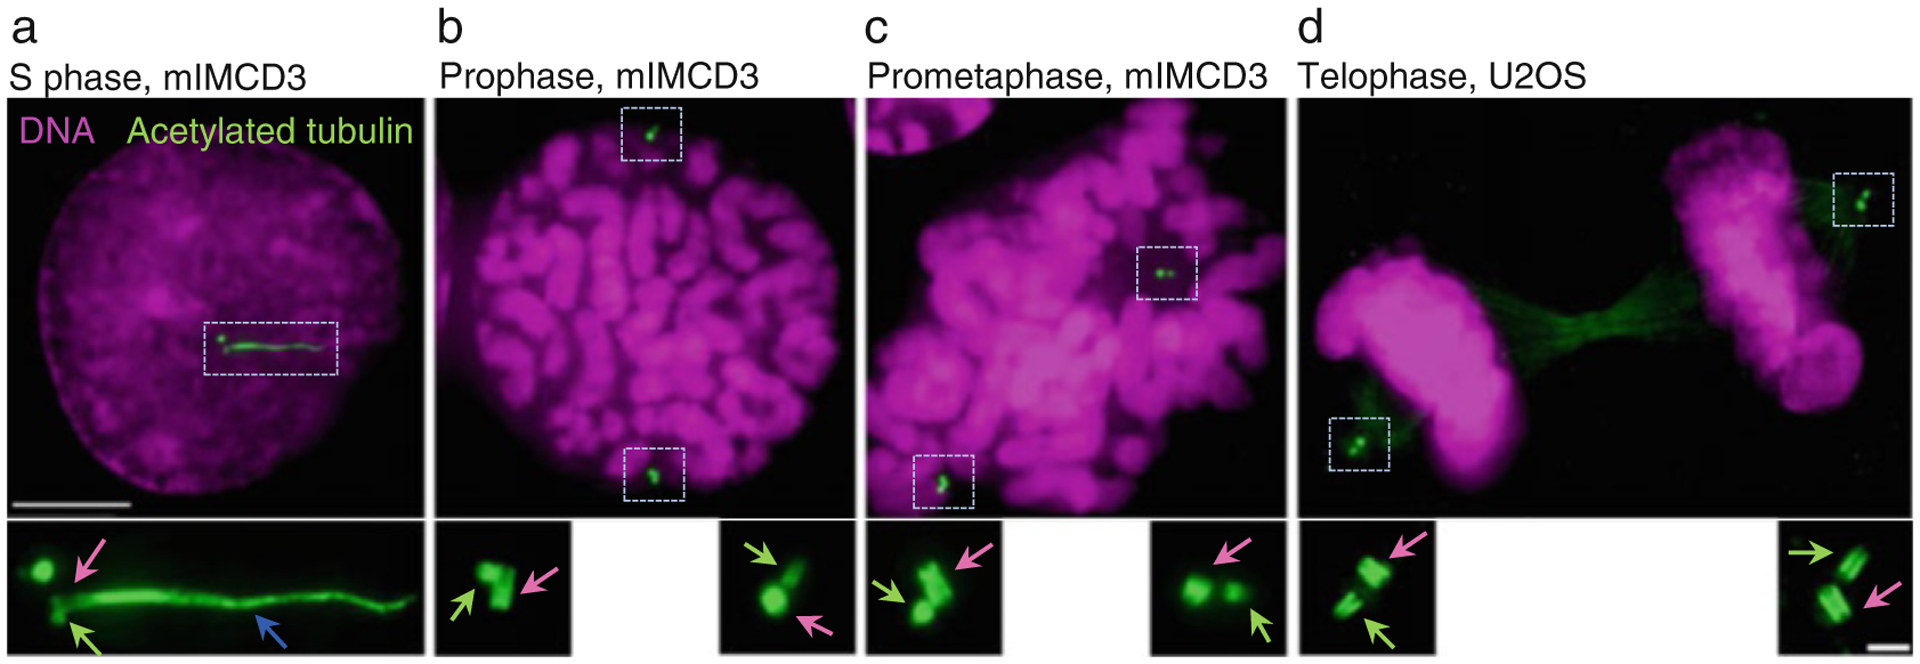
Expansion microscopy is an imaging method based on isotropic physical expansion of biological samples, which improves optical resolution and allows imaging of subresolutional cellular components by conventional microscopes. Centrioles are small microtubule-based cylindrical structures that build centrosomes and cilia, two organelles essential for vertebrates. Due to a centriole's small size, electron microscopy has traditionally been used to study centriole length and ultrastructural features. Recently, expansion microscopy has been successfully used as an affordable and accessible alternative to electron microscopy in the analysis of centriole and cilia length and structural features. Here, we describe an expansion microscopy approach for the analysis of centrioles and cilia in large populations of mammalian adherent and nonadherent cells and multiciliated cultures.

Keywords: Centriole; Centriole length; Centrosome; Cilia; Expansion microscopy.


Figures

Fig. 1
Fig. 1
Organization of a human centriole/centrosome. Scheme shows organization of a typical duplicated mother centriole associated with a procentriole. Human centrioles are built of nine microtubule triplets organized in a perfect rotational symmetry. Mother centrioles are, on their proximal end, associated with a proteinaceous complex called pericentriolar material, which is the site of many centrosomal functions. A centriole with associated pericentriolar material is called a centrosome. On their distal end, fully assembled mother centrioles harbor distal appendages and subdistal appendages, which mediate cilia assembly and microtubule anchoring, respectively. Centrioles propagate by duplication, during which a new procentriole forms in association with the proximal end of the mother centriole. Proximal ends of procentriole contains a cartwheel, which promotes ninefold organization of procentrioles. A typical somatic cell has only two mother centrioles, which can be unduplicated (in G1), or duplicated (in S, G2, and mitosis)
Fig. 2
Fig. 2
Key steps in sample preparation for expansion microscopy. A scheme illustrates major steps of the protocol, as described in the subheadings of Subheading 3. Cells growing on the coverslip are fixed and then incubated in a mixture of acrylamide and formaldehyde solution, which establishes chemical groups required for crosslinking of the sample components to the polymer during subsequent polymerization step. After polymerization, the sample is cut to several smaller samples. Individual samples (or ‘punches’ if a biopsy puncher is used to excise smaller pieces of the gel) are boiled in the presence of high SDS concentration, to denature proteins and to allow expansion of various cellular structures. During this time, the gel, and the biological specimen within, expands ~2-fold. In the subsequent step, SDS is thoroughly washed out of the gel, which is required for efficient immunolabeling. Proteins of interest are then immunolabeled with primary and secondary antibodies, and DNA is labeled using DAPI. After immunolabeling, samples are gradually expanded by incubation in dH2O
Fig. 3
Fig. 3
Polymerization and punching. (a) A 100-mm petri dish with its bottom layered by Parafilm on the top of an ice–water bath. Two coverslips with cells facing up are covered with polymerization mixture. Samples are kept on ice during the first 20 min of polymerization, followed by incubation at RT for another 1–2 h (b). (c) A coverslip containing cells and polymerized gel before (left) and after (right) samples have been excised using a 4-mm biopsy puncher (green, below). Multiple individual samples can be excised from one gel. (d) Punching and transferring of a punch to a 50 mL conical tube
Fig. 4
Fig. 4
Denaturation by boiling in SDS buffer. (a) One 50 mL conical tube with multiple gel punches before boiling. (b) Equipment used for boiling of the samples. (c) Assembled boiling equipment. Large and small beaker are filled with water. A polystyrene tube-rack and weight serve to prevent evaporation and splashes during boiling. A thermometer is used to monitor the real-time temperature of the water bath. Samples are heated in 50 mL conical tubes
Fig. 5
Fig. 5
Expansion of immunolabelled samples and mounting of the samples for imaging. (a) Examples of gel punches at three different stages of the protocol. Left: After punching. Middle: after SDS wash-out. Right: after expansion in dH2O. (b) Attofluor chamber with an expanded punch. (c) A glass bottom dish with an expanded punch. (d) Left: A Rose chamber with an expanded punch and filled with dH2O assembled for imaging. Right: A scheme illustrates an assembled Rose chamber as viewed from the side (for more details see Subheading 3.9). Rose chambers are ideal for imaging of expanded gels because both surfaces of the gel can be accessible for imaging by flipping the chamber. This is particularly useful if there is ambiguity as to which surface contains a layer of cells. In addition, the gel is secured between two coverslips, which prevents moving of the gel during imaging. (e) Example of an expanded punch placed in the Rose chamber before addition of dH2O and closing of the chamber with the upper coverslip and the upper metal plate. Please note that the volume of polymerization solution (Subheading 3.3) needs to be adjusted to yield the gel thickness optimal for immunostaining and imaging. Alternatively, excess gel can be cut off using a scalpel
Fig. 6
Fig. 6
Examples of expanded centrioles and cilia using herein described method. Cells were grown on coverslips, expanded ~4.2×, and immunolabeled using an antibody recognizing acetylated tubulin. DNA is labeled with DAPI. (a) An interphase cell with two mother centrioles (pink arrow) associated with procentrioles (green arrow). One mother centriole is ciliated (blue arrow is pointing to the ciliary axoneme). (bd) Examples of cells in various stages of mitosis. Each mother centriole (pink arrows) is associated with one procentriole (green arrows). Centrioles are in various orientations. Scale bars: 20 and 2 μm for the inserts

Similar articles

Cited by

References

    1. Schermelleh L et al. (2019) Super-resolution microscopy demystified. Nat Cell Biol 21(1):72–84 - PubMed
    1. Bates M, Huang B, Zhuang X (2008) Super-resolution microscopy by nanoscale localization of photo-switchable fluorescent probes. Curr Opin Chem Biol 12(5):505–514 - PMC - PubMed
    1. Schermelleh L, Heintzmann R, Leonhardt H (2010) A guide to super-resolution fluorescence microscopy. J Cell Biol 190(2):165–175 - PMC - PubMed
    1. Asano SM et al. (2018) Expansion microscopy: protocols for imaging proteins and RNA in cells and tissues. Curr Protoc Cell Biol 80(1): e56. - PMC - PubMed
    1. Chen F, Tillberg PW, Boyden ES (2015) Optical imaging. Expansion microscopy. Science 347(6221):543–548 - PMC - PubMed

Publication types

LinkOut - more resources