Automated Real-Time Eddy Current Array Inspection of Nuclear Assets
- PMID: 36015795
- PMCID: PMC9414535
- DOI: 10.3390/s22166036
Automated Real-Time Eddy Current Array Inspection of Nuclear Assets
Abstract
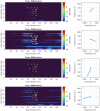
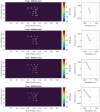
Inspection of components with surface discontinuities is an area that volumetric Non-Destructive Testing (NDT) methods, such as ultrasonic and radiographic, struggle in detection and characterisation. This coupled with the industrial desire to detect surface-breaking defects of components at the point of manufacture and/or maintenance, to increase design lifetime and further embed sustainability in their business models, is driving the increased adoption of Eddy Current Testing (ECT). Moreover, as businesses move toward Industry 4.0, demand for robotic delivery of NDT has grown. In this work, the authors present the novel implementation and use of a flexible robotic cell to deliver an eddy current array to inspect stress corrosion cracking on a nuclear canister made from 1.4404 stainless steel. Three 180-degree scans at different heights on one side of the canister were performed, and the acquired impedance data were vertically stitched together to show the full extent of the cracking. Axial and transversal datasets, corresponding to the transmit/receive coil configurations of the array elements, were simultaneously acquired at transmission frequencies 250, 300, 400, and 450 kHz and allowed for the generation of several impedance C-scan images. The variation in the lift-off of the eddy current array was innovatively minimised through the use of a force-torque sensor, a padded flexible ECT array and a PI control system. Through the use of bespoke software, the impedance data were logged in real-time (≤7 ms), displayed to the user, saved to a binary file, and flexibly post-processed via phase-rotation and mixing of the impedance data of different frequency and coil configuration channels. Phase rotation alone demonstrated an average increase in Signal to Noise Ratio (SNR) of 4.53 decibels across all datasets acquired, while a selective sum and average mixing technique was shown to increase the SNR by an average of 1.19 decibels. The results show how robotic delivery of eddy current arrays, and innovative post-processing, can allow for repeatable and flexible surface inspection, suitable for the challenges faced in many quality-focused industries.
Keywords: automated eddy current testing; eddy current arrays; non-destructive evaluation; robotic NDE.
Conflict of interest statement
The authors declare no conflict of interest.
Figures


References
-
- Non-Destructive Testing (NDT) Market Size Growth Analysis 2029. n.d. [(accessed on 7 June 2022)]. Available online: https://www.fortunebusinessinsights.com/non-destructive-testing-ndt-mark....
-
- Mineo C., MacLeod C., Morozov M., Pierce S.G., Lardner T., Summan R., Powell J., McCubbin P., McCubbin C., Munro G., et al. Fast ultrasonic phased array inspection of complex geometries delivered through robotic manipulators and high speed data acquisition instrumentation; Proceedings of the 2016 IEEE International Ultrasonics Symposium (IUS); Tours, France. 18–21 September 2016; pp. 1–4. - DOI
-
- Mineo C., MacLeod C.N., Su R., Lines D., Davì S., Cowan B., Pierce S.G., Paton S., Munro G., McCubbin C., et al. Robotic geometric and volumetric inspection of high value and large scale aircraft wings; Proceedings of the 2019 IEEE International Workshop on Metrology for AeroSpace; Turin, Italy. 19–21 June 2019.
-
- Mineo C., Vasilev M., Cowan B., MacLeod C.N., Pierce S.G., Wong C., Yang E., Fuentes R., Cross E.J. Enabling robotic adaptive behaviour capabilities for new industry 4.0 automated quality inspection paradigms. Insight-Non-Destr. Test. Cond. Monit. 2020;62:338–344. doi: 10.1784/insi.2020.62.6.338. - DOI
MeSH terms
Grants and funding
LinkOut - more resources
Full Text Sources
Research Materials
Miscellaneous

