Study on Surface Roughness, Morphology, and Wettability of Laser-Modified Powder Metallurgy-Processed Ti-Graphite Composite Intended for Dental Application
- PMID: 38135997
- PMCID: PMC10740645
- DOI: 10.3390/bioengineering10121406
Study on Surface Roughness, Morphology, and Wettability of Laser-Modified Powder Metallurgy-Processed Ti-Graphite Composite Intended for Dental Application
Abstract
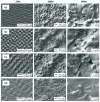
In this study, the surface laser treatment of a new type of dental biomaterial, a Ti-graphite composite, prepared by low-temperature powder metallurgy, was investigated. Different levels of output laser power and the scanning speed of the fiber nanosecond laser with a wavelength of 1064 nm and argon as a shielding gas were used in this experiment. The surface integrity of the machined surfaces was evaluated to identify the potential for the dental implant's early osseointegration process, including surface roughness parameter documentation by contact and non-contact methods, surface morphology assessment by scanning electron microscopy, and surface wettability estimation using the sessile drop technique. The obtained results showed that the surface roughness parameters attributed to high osseointegration relevance (Rsk, Rku, and Rsm) were not significantly influenced by laser power, and on the other hand, the scanning speed seems to have the most prevalent effect on surface roughness when exhibiting statistical differences in all evaluated profile roughness parameters except Rvk. The obtained laser-modified surfaces were hydrophilic, with a contact angle in the range of 62.3° to 83.2°.
Keywords: composite; contact angle; laser; machining; morphology; powder metallurgy; roughness; surface; titanium.
Conflict of interest statement
The authors declare no conflict of interest. The funders had no role in the design of the study; in the collection, analyses, or interpretation of data; in the writing of the manuscript; or in the decision to publish the results.
Figures


References
-
- Sypniewska J., Szkodo M. Influence of Laser Modification on the Surface Character of Biomaterials: Titanium and Its Alloys—A Review. Coatings. 2022;12:1371. doi: 10.3390/coatings12101371. - DOI
-
- bin Fadzil A.F.A., Pramanik A., Basak A.K., Prakash C., Shankar S. Role of surface quality on biocompatibility of implants—A review. Ann. 3D Print. Med. 2022;8:100082. doi: 10.1016/j.stlm.2022.100082. - DOI
-
- Uhlmann E., Schweitzer L., Kieburg H., Spielvogel A., Huth-Herms K. The Effects of Laser Microtexturing of Biomedical Grade 5 Ti-6Al-4V Dental Implants (Abutment) on Biofilm Formation. Procedia CIRP. 2018;68:184–189. doi: 10.1016/j.procir.2017.12.044. - DOI
-
- Medvids A., Onufrijevs P., Kaupužs J., Eglitis R., Padgurskas J., Zunda A., Mimura H., Skadins I., Varnagiris S. Anatase or rutile TiO2 nanolayer formation on Ti substrates by laser radiation: Mechanical, photocatalytic and antibacterial properties. Opt. Laser Technol. 2021;138:106898. doi: 10.1016/j.optlastec.2020.106898. - DOI
Grants and funding
- VEGA 2/0054/23 and KEGA 026STU-4/2023/Ministry of Education, Science, Research and Sport of the Slovak Republic
- 2/0054/23/Laser surface modification of Ti -TiB2 biocom-posites prepared by powder metallurgy process in order to increase their osseointegration
- 026STU-4/2023/Implementation of innovative learning methods and practical training to education in the field of production technologies and production management to increase the attractiveness of study and support the key competencies of the students
- KOMPLAS/The research of the laser modified surfaces of biomedical Ti-based material prepared by powder metallurgy way
LinkOut - more resources
Full Text Sources

